前回と前々回で、@ITのいまさら聞けないDocker入門1~2を参考にしつつ、CentOS7+Docker を触ってみました。ついでにCoreOSも触ってみて、入門3の内容はCoreOSで試してみようと思います。
CoreOSって?
CoreOSはKernelイメージとSystemdだけで、Docker用に作成されたものらしい。
OSに不要な機能があるよりも、ボクサーみたいな必要なものだけ積んでた方がいいかなってイメージかしら??
CoreOSを用意する
まずはISOイメージを持ってきて、いつも通りVMwareで立ち上げよう。
CDブートのようにLinuxが立ち上がり、AutoLoginされます。
ユーザ名Coreのパスワードを設定するだけでSSH接続できるので、設定しちゃいましょう
$ sudo passwd core
これさえやればSSHで繋ぐ。
login as: core
core@192.168.24.72's password:
Last login: Sat Jul 12 16:56:27 2014
CoreOS (beta)
Update Strategy: No Reboots
core@localhost ~ $
今の状態はUbuntuやPuppyLinuxのように、まだOSがインストールされていないので、手動でインストールが必要な訳だが、VMwareにインストールするなら以下の手順になるようだ。
・イメージ起動
・AutoLogin
・Coreにパスワードを付ける
・SSHログイン
・cloud-config作成
・インストール
・リブート
・完
だいたいの参考サイトが鍵認証にしているんだけど、ローカルで試すだけだし、公式サイトにパスワード認証でのやり方が載ってたので、パスワード認証で作ります。
まずはハッシュ化されたパスワードを作成。
[root@dockerkencho ~]# openssl passwd -1
Password:
Verifying - Password:
$1$CoSFIqnH$z.s5CC2BqUhnKuJl6dNC8/
cloudconfigを作りましょう。
bash-4.2# cat config
#cloud-config

users:
 -  name: core
    passwd: $1$CoSFIqnH$z.s5CC2BqUhnKuJl6dNC8/
ではインストールします。
bash-4.2# coreos-install -d /dev/sda -C alpha -c config
Downloading and verifying coreos_production_image.bin.bz2...
--2014-07-12 08:52:44--  http://alpha.release.core-os.net/amd64-usr/353.0.0/coreos_production_image.bin.bz2
Resolving alpha.release.core-os.net... 173.194.72.128
Connecting to alpha.release.core-os.net|173.194.72.128|:80... connected.
HTTP request sent, awaiting response... 200 OK
Length: 175405804 (167M) [application/octet-stream]
Saving to: `/tmp/coreos-install.tZNZ3WWm8i/coreos_production_image.bin.bz2'

100%[==========================================================>] 175,405,804 9.87M/s   in 23s

2014-07-12 08:53:08 (7.18 MB/s) - `/tmp/coreos-install.tZNZ3WWm8i/coreos_production_image.bin.bz2' saved [175405804/175405804]

2014-07-12 08:53:08 URL:http://alpha.release.core-os.net/amd64-usr/353.0.0/coreos_production_image.bin.bz2.sig [543/543] -> "/tmp/coreos-install.tZNZ3WWm8i/coreos_production_image.bin.bz2.sig" [1]
gpg: Signature made Thu Jun 19 02:23:58 2014 UTC using RSA key ID 74E7E361
gpg: key 93D2DCB4 marked as ultimately trusted
gpg: checking the trustdb
gpg: 3 marginal(s) needed, 1 complete(s) needed, PGP trust model
gpg: depth: 0  valid:   1  signed:   0  trust: 0-, 0q, 0n, 0m, 0f, 1u
gpg: Good signature from "CoreOS Buildbot (Offical Builds) <buildbot@coreos.com>"
Writing coreos_production_image.bin.bz2 to /dev/sda...
  /tmp/coreos-install.tZNZ3WWm8i/coreos_production_image.bin.bz2: done
Installing cloud-config...
Success! CoreOS alpha 353.0.0 is installed on /dev/sda
とくに選択項目もなく、自動でインストールが出来上がります。
リブートしてログインしてみよう。
login as: core
core@192.168.24.72's password:
Last login: Sat Jul 12 08:54:42 2014
CoreOS (alpha)
core@localhost ~ $
パスワード認証でログインできました。
Dockerはインストール済み、流石Docker専用OSだ。
core@localhost ~ $ docker info
Containers: 0
Images: 0
Storage Driver: btrfs
Execution Driver: native-0.2
Kernel Version: 3.15.2+
core@localhost ~ $ docker version
Client version: 1.0.1
Client API version: 1.12
Go version (client): go1.2
Git commit (client): 990021a
Server version: 1.0.1
Server API version: 1.12
Go version (server): go1.2
Git commit (server): 990021a
とりあえず、CentOS+Dockerで試したことと同じくUbuntuのコンテナーを作ってみる
core@localhost ~ $ docker pull ubuntu:latest
Pulling repository ubuntu
e54ca5efa2e9: Download complete
511136ea3c5a: Download complete
d7ac5e4f1812: Download complete
2f4b4d6a4a06: Download complete
83ff768040a0: Download complete
6c37f792ddac: Download complete

core@localhost ~ $ docker run -it --name ubuntu1 ubuntu /bin/bash
root@07e3530ee6b9:/#
数分でできたでござる。
いまさら聞けないDocker入門3をやってみゆ
core@localhost ~ $ sudo -s
localhost core # docker images
REPOSITORY          TAG                 IMAGE ID            CREATED             VIRTUAL SIZE
<none>              <none>              5e30ae3b2a65        15 hours ago        178.5 MB
takeken/apache2     latest              58262379233f        15 hours ago        294.8 MB
ubuntu              12.04               ea7d6801c538        2 weeks ago         127.4 MB
ubuntu              latest              e54ca5efa2e9        3 weeks ago         276.1 MB
localhost core #
ちょっといじってたのでimagesが何個かあるけど。
core@localhost ~/nginx1 $ cat Dockerfile
FROM ubuntu
MAINTAINER takeken
RUN apt-get install -y nginx
ADD index.html /usr/share/nginx/html/

core@localhost ~/nginx1 $ ls
Dockerfile  index.html
実行すると。
core@localhost ~/nginx1 $ docker build -t takeken/nginx:1.0 .
Sending build context to Docker daemon 3.584 kB
Sending build context to Docker daemon
Step 0 : FROM ubuntu
 ---> e54ca5efa2e9
Step 1 : MAINTAINER takeken
 ---> Running in 3da670898543
Dockerfileの記述の通りに進んで行って、イメージが出来上がるようです。
Successfully built 5a8c1ae47320
core@localhost ~/nginx1 $ docker images
REPOSITORY          TAG                 IMAGE ID            CREATED             VIRTUAL SIZE
takeken/nginx       1.0                 5a8c1ae47320        13 seconds ago      294.2 MB
<none>              <none>              5e30ae3b2a65        15 hours ago        178.5 MB
takeken/apache2     latest              58262379233f        15 hours ago        294.8 MB
ubuntu              12.04               ea7d6801c538        2 weeks ago         127.4 MB
ubuntu              latest              e54ca5efa2e9        3 weeks ago         276.1 MB
できました。すごいね。
core@localhost ~/nginx1 $ docker run -d -p 80:80 --name nginx1 takeken/nginx:1.0 /usr/sbin/nginx -g 'daemon off;' -c /etc/nginx/nginx.conf
f92bf4a0b80638be329bbbf2ff799ae0bd423c7a6e4e440ebb22a1d1b194e354

core@localhost ~/nginx1 $ docker ps
CONTAINER ID        IMAGE               COMMAND                CREATED             STATUS              PORTS                NAMES
f92bf4a0b806        takeken/nginx:1.0   /usr/sbin/nginx -g '   7 seconds ago       Up 6 seconds        0.0.0.0:80->80/tcp   nginx1

core@localhost ~/nginx1 $ curl localhost
Hello!
ここまでは無事に難なく(でもないのだが)いけました。
前回Docker runでやっていた事は、DockerfileにENTRYPOINTとCMDの記述をすることで可能なようです。
Dockerfileに
ENTRYPOINT /usr/sbin/nginx -g 'daemon off;'-c /etc/nginx/nginx.conf
を追記して、またイメージの作成とコンテナーの作成をしてみます。
core@localhost ~/nginx1 $ docker build -t takeken/nginx:1.1 .
Sending build context to Docker daemon 3.584 kB
Sending build context to Docker daemon
Step 0 : FROM ubuntu
 ---> e54ca5efa2e9
Step 1 : MAINTAINER takeken
 ---> Using cache
 ---> 72e91ff73e1e
Step 2 : RUN apt-get install -y nginx
 ---> Using cache
 ---> b7c32dc9edfe
Step 3 : ADD index.html /usr/share/nginx/html/
 ---> Using cache
 ---> 5a8c1ae47320
Step 4 : ENTRYPOINT /usr/sbin/nginx -g 'daemon off;' -c /etc/nginx/nginx.conf
 ---> Running in 3d6a591e478d
 ---> 611f8ec358ac
Removing intermediate container 3d6a591e478d
Successfully built 611f8ec358ac
core@localhost ~/nginx1 $ docker run -d --name nginx2 -p 80:80 takeken/nginx:1.1
3e121d5ddb0780133f0cc882646480534abaa2706a35f1fdf734754e796c39cc
core@localhost ~/nginx1 $ docker ps
CONTAINER ID        IMAGE               COMMAND                CREATED             STATUS              PORTS                NAMES
3e121d5ddb07        takeken/nginx:1.1   /bin/sh -c '/usr/sbi   10 seconds ago      Up 9 seconds        0.0.0.0:80->80/tcp   nginx2
core@localhost ~/nginx1 $ curl localhost
Hello!
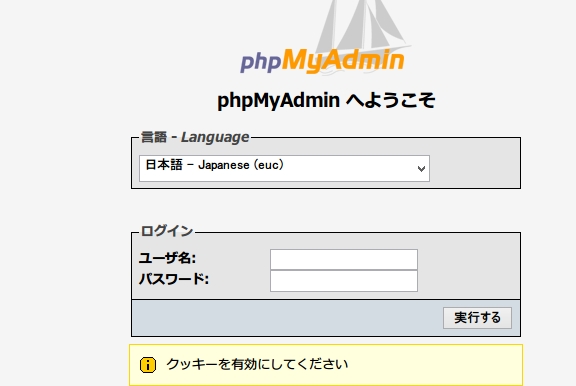
ブラウザでも確認できました。
Dockerがあれば、何でもできる!とでもいうのでしょうか。
そんな時代なのか。次回はDocker Hubを取り扱うようですが楽しみですね。
せっかくだし何かDockerfileを探してみてbuildしてみますか
基本はLampかなぁとDocker lampでググったら
しかし、Dockerfileを眺めてみると、これってOSインストールしたらこれぐらいはやっとけスクリプトに似てるんだな。
じゃあドッカーンといくかーと思ったら、どうも今だとCentOSが7となり、Systemdになっているせいか上手くいかない。
シェルで確認してみるとやっぱりそうだ。
あと、CentOS7からMysqlがMariaDBになってた。
bash-4.2# cat /etc/redhat-release
CentOS Linux release 7.0.1406 (Core)
bash-4.2#
つうことで、そのままだと色々とエラーがでるので、いろいろ修正しながら進めていくと、イメージの作成はうまくいった。
core@localhost ~/Lamp/docker-centos-lamp $ sudo docker build -t centos:lamp .
Successfully built 961cccdd0be4
core@localhost ~/Lamp/docker-centos-lamp $
core@localhost ~/Lamp/docker-centos-lamp $ docker images
REPOSITORY          TAG                 IMAGE ID            CREATED             VIRTUAL SIZE
centos              lamp                a83358680a75        About an hour ago   719.1 MB
動かしてみると
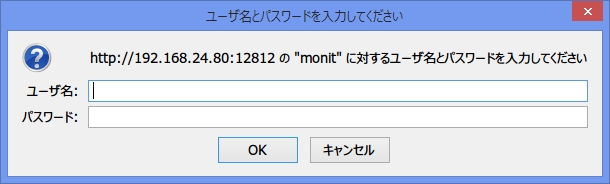
core@localhost ~/Lamp/docker-centos-lamp $ sudo docker run -d -t -p 12812:2812 -p 10080:80 -p 10022:22 centos:lamp /usr/bin/monit -I
3bf01baecee1982c87b9f4444e8ebb6877b1f5535bb879f5570b74956c030d13
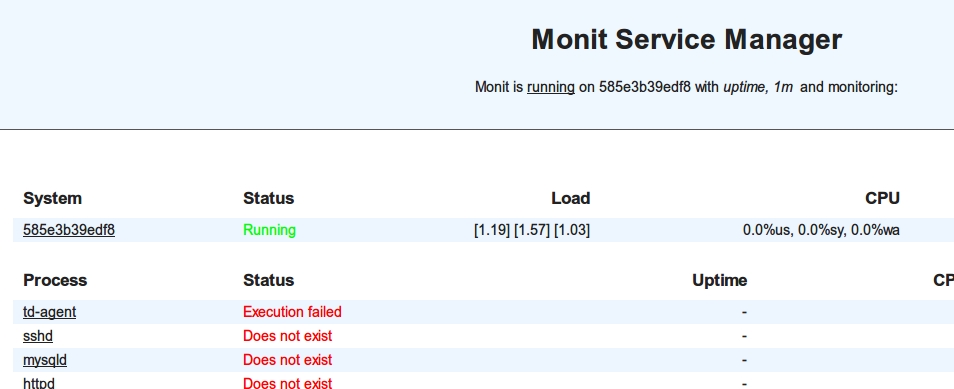
こんな風にちゃんと動いてる風なんだが、接続が上手くいかない。
というか、サービスが動いてないっぽい。
ログを見てみると、たぶんこのサイトと同じ原因じゃないかなと。
td-agent のインストールも失敗してるし。
ログ
core@localhost ~/Lamp/docker-centos-lamp $ docker logs hopeful_hypatia
/etc/monit.d/td-agent:2: Warning: Program does not exist: '/etc/init.d/td-agent'
/etc/monit.d/td-agent:3: Warning: Program does not exist: '/etc/init.d/td-agent'
/etc/monit.d/sshd:2: Warning: Program does not exist: 'systemctl'
/etc/monit.d/sshd:3: Warning: Program does not exist: 'systemctl'
/etc/monit.d/mysqld:2: Warning: Program does not exist: 'systemctl'
/etc/monit.d/mysqld:3: Warning: Program does not exist: 'systemctl'
/etc/monit.d/httpd:2: Warning: Program does not exist: 'systemctl'
/etc/monit.d/httpd:3: Warning: Program does not exist: 'systemctl'
参考サイト
【助けて】 docker上のCentOS7でsystemctlが使えずmariadbが起動できない
bash-4.2# systemctl
Failed to get D-Bus connection: No connection to service manager.
bash-4.2# cat /etc/redhat-release
CentOS Linux release 7.0.1406 (Core)
いろいろ調べたけど、今のスキルでは無理ぽい。
ならばDocker上のOSをCentOS6にしちゃおう。
core@localhost ~/Lamp/docker-centos-lamp $ docker search  centos6 | grep base
flores314/centos65                  Docker image base. Built from a CentOS 6.5...   1
xdrum/centos64-base                 CentOS 6.4 x86_64 base/minimal image (crea...   1
fatherlinux/centos6-base            Centos6, same method as RHEL6 image             0
y4m4/centos6                        GlusterFS 3.5 base image for CentOS 6.5  [...   0
bjowi/centos6                       Minimal CentOS 6 base image.                    0
yamamon/base-centos65               CentOS6.5 Base Imange                           0
centminmod/centos65base             CentOS 6.5 base image for CentminMod projects   0
wjd300/centos6.2-base                                                               0
mswinson/centos65-base                                                              0
jpaas/centos6.3-base                                                                0
jpaas/centos6.3-dev-base                                                            0
monofraps/centos65-base                                                             0
nuxro/centos65-x86_64-base          Centos 64bit with @Base package group           0
この中から選んでみるか。てーか自分で作っても良かったね。
@ITでDocker hubの特集をしたらそっちをやってみよう。
そうこうしている間にイメージが出来上がった。
Successfully built 65716fcb31d7
それではCentOS6で作成したイメージで実行してみるぞ!
[root@dockerkencho docker-centos-lamp]# sudo docker run -d -t -p 12812:2812 -p 10080:80 -p 10022:22 centos:lamp /usr/bin/monit -I
585e3b39edf8cbeaaccfd33deafa54a13551c04b9983e7c9d280f150f5f0ffe4

[root@dockerkencho docker-centos-lamp]# docker ps
CONTAINER ID        IMAGE               COMMAND             CREATED             STATUS              PORTS                                                                   NAMES
585e3b39edf8        centos:lamp         /usr/bin/monit -I   5 seconds ago       Up 4 seconds        0.0.0.0:10022->22/tcp, 0.0.0.0:10080->80/tcp, 0.0.0.0:12812->2812/tcp   happy_goodall
よっしゃよっしゃ。これでSystemdが原因で動かなかったのは鉄板だな。
CentoS7になってたアクシデントによって、だいぶ時間をかけてしまったけど、その分Dockerのコマンドをいろいろ使う事ができたしヨシとしませう。
あと全てが終わってから知ったのだけど、CentOS6は
FROM centos:centos6
で良かったようだ・・・orz