もうちいっとばかりコード化をやりますか。
前回はWeb+DBのサーバ/インフラ徹底攻略に沿って進めてただけなので、思ったより理解度が低いかな~って気がするので、Vagrantやその他もろもろのインストールは飛ばしますが、改めて最初からやる。
まずは自分のBOXを作ろう
ちょっとまって、そのBOX大丈夫?という事で、自分で作っておきますよっと。
ただメンドクサイことにUbuntuserverにはX Windowは入れていないのと、Windows環境ではVMwareなのだよ。
環境
Ubuntu14
VirualBOX 4.3(apt)
Vagrant 1.6.5
Windows8.1
VMware Player
参考サイト
CentOS 6.5 x86_64 minimalのVagrant boxを作ってみた
参考サイトを参考にBOXに向いたサーバーを構築します。
VMwareからVirtuslBOXに移行してVagrantで取り込みます。
VMはというと、yum updateはしたけど、その他パッケージ類はまったく入れてません。
VMwareからVirtualBOXの移行について
VMwareに付属しているOVFToolを使います。
Winキー+R でcmdを叩きましょう。OVFTOOLのパスはそれぞれで確認しよう。
C:\Program Files (x86)\VMware\VMware Player\OVFTool>
C:\Program Files (x86)\VMware\VMware Player\OVFTool>ovftool.exe "D:\ドキュメント
\Virtual Machines\vm\vm.vmx" "C:\Users\takeken\Desktop"
Opening VMX source: D:\ドキュメント\Virtual Machines\vm\vm.vmx
Opening OVF target: C:\Users\takeken\Desktop
Writing OVF package: C:\Users\takeken\Desktop\vm\vm.ovf
Progress: 2%
実行は至って簡単でexeを1回実行するだけ。
Transfer Completed
Completed successfully
と表示されれば完了です。
vm.mf
vm.ovf
vm-disk1.vmdk
vm-file1.iso
上記のように4個のファイルが出来上がっていると思いますが、mfファイルは不要らしくあると失敗するらしいので削除してしまいます。
以上です!
では本題に戻って、Win機の上のVMwareで作っていたベースとなるCentOSをサーバー機のUbuntuへ飛ばしてBOX化させるという手順に進みます。
BOXを作ってみよう
・・・
Ubuntuサーバーにファイルの移動が終わりました。FileZilaを使ってSFTPでサーバー機へ飛ばしています。何の設定も不要なので、とっても楽です。
vagrant@ubuntu:~/vmware$ ls
vm-disk1.vmdk  vm.ovf
では、このovfファイルをVirtualBOXにインポートしましょう。と、ここまではサクサク進んで良かったのですが、ここからは結構苦戦したというか、久しぶりに数日間かかりました。
まずはWin機のVMwareから取り込んだOVFファイルからVirtualBOXにインポートします。
vagrant@ubuntu:/home/takeken/vmware$ vboxmanage import vm.ovf
vagrant@ubuntu:~/vmware$ vboxmanage import vm.ovf
0%...10%...20%...30%...40%...50%...60%...70%...80%...90%...100%
Interpreting /home/vagrant/vmware/vm.ovf...
OK.
Disks:  vmdisk1 20      1214775296      http://www.vmware.com/interfaces/specifications/vmdk.html#streamOptimized   vm-disk1.vmdk   508630528       -1
Virtual system 0:
 0: Suggested OS type: "RedHat_64"
    (change with "--vsys 0 --ostype <type>"; use "list ostypes" to list all possible values)
 1: Suggested VM name "vm"
    (change with "--vsys 0 --vmname <name>")
 2: Number of CPUs: 1
    (change with "--vsys 0 --cpus <n>")
 3: Guest memory: 1024 MB
    (change with "--vsys 0 --memory <MB>")
 4: USB controller
    (disable with "--vsys 0 --unit 4 --ignore")
 5: Network adapter: orig nat, config 5, extra type=nat
 6: SCSI controller, type LsiLogic
    (change with "--vsys 0 --unit 6 --scsitype {BusLogic|LsiLogic}";
    disable with "--vsys 0 --unit 6 --ignore")
 7: Hard disk image: source image=vm-disk1.vmdk, target path=/home/vagrant/VirtualBox VMs/vm/vm-disk1.vmdk, controller=6;channel=0
    (change target path with "--vsys 0 --unit 7 --disk path";
    disable with "--vsys 0 --unit 7 --ignore")
0%...10%...20%...30%...40%...50%...60%...70%...80%...90%...100%
Successfully imported the appliance.
取り込みは終了。
vagrant@ubuntu:~/vmware$ vboxmanage showvminfo vm
Name:            vm
Groups:          /
Guest OS:        Red Hat (64 bit)
UUID:            53ad5fdb-1832-47a4-ab61-d7eee907b0e2
Config file:     /home/vagrant/VirtualBox VMs/vm/vm.vbox
Snapshot folder: /home/vagrant/VirtualBox VMs/vm/Snapshots
Log folder:      /home/vagrant/VirtualBox VMs/vm/Logs
Hardware UUID:   53ad5fdb-1832-47a4-ab61-d7eee907b0e2
Memory size:     1024MB
ここまではいいのですが。
パッケージーング!
なんだか上手くいきそうだ。そんな雰囲気がしている。
とか思ってひたすら繰り返しつつ、結局数日間もかかったっていう。
vagrant@ubuntu:/home/takeken/vmware$ sudo vagrant package --base vm
==> vm: Exporting VM...
==> vm: Compressing package to: /home/takeken/vmware/package.box
できあがったものをvagrant box add でBOXとして追加します。
vagrant@ubuntu:~/vmware$ vagrant box add cent_base package.box
==> box: Adding box 'cent_base' (v0) for provider:
    box: Downloading: file:///home/vagrant/vmware/package.box
==> box: Successfully added box 'cent_base' (v0) for 'virtualbox'!
では作業ディレクトリにうつって、このBoxでコード化物語を始めた・・・かったのだが。
vagrant@ubuntu:~/vmware$ vagrant box list
cent_base (virtualbox, 0)


vagrant@ubuntu:~/vmware$ vagrant init cent_base
A `Vagrantfile` has been placed in this directory. You are now
ready to `vagrant up` your first virtual environment! Please read
the comments in the Vagrantfile as well as documentation on
`vagrantup.com` for more information on using Vagrant.
ググると色々でてくるのだけれど、どれもダメだった。
以下のログ。
root@ubuntu:~/test-infra-cent# vagrant up
Bringing machine 'default' up with 'virtualbox' provider...
==> default: Clearing any previously set forwarded ports...
==> default: Clearing any previously set network interfaces...
==> default: Preparing network interfaces based on configuration...
    default: Adapter 1: nat
==> default: Forwarding ports...
    default: 22 => 2222 (adapter 1)
==> default: Booting VM...
==> default: Waiting for machine to boot. This may take a few minutes...
    default: SSH address: 127.0.0.1:2222
    default: SSH username: vagrant
    default: SSH auth method: private key
    default: Warning: Connection timeout. Retrying...
    default: Warning: Connection timeout. Retrying...
    default: Warning: Connection timeout. Retrying...
    default: Warning: Connection timeout. Retrying...
    default: Warning: Connection timeout. Retrying...

Timed out while waiting for the machine to boot. This means that
Vagrant was unable to communicate with the guest machine within
the configured ("config.vm.boot_timeout" value) time period.

If you look above, you should be able to see the error(s) that
Vagrant had when attempting to connect to the machine. These errors
are usually good hints as to what may be wrong.

If you're using a custom box, make sure that networking is properly
working and you're able to connect to the machine. It is a common
problem that networking isn't setup properly in these boxes.
Verify that authentication configurations are also setup properly,
as well.

If the box appears to be booting properly, you may want to increase
the timeout ("config.vm.boot_timeout") value.
たまたま見つけた方法でインストールしたVMの設定を弄ってみる。
Vagrantでは無理だけど、Virtualboxから起動してVNCで繋ぐことはできるようだ。
起動がうまくいかない!
QEMU、Dockerでも全く問題なかった部分で躓いているようです。
今回はWindowsとLinuxを、VMwareとVirtualboxをまたいでいたりといろいろ不確定要素が高いのですが、それでもこんだけ嵌るのは久し振りだ。
たまたま起承転と進んでるようだが、ぜんぜん嬉しくなー!
転という事だし、もうWindowsは頼らない。GUIには頼らない。
今までの事は無かったかのように進めよう。
・・・
心機一転、バージョンもアップして、さあ進めるか!とガッツリ気合ものって絶好調だったが、今度はVNCが繋がらなくなってしまった。(´・ω・`)
設定は間違っていない・・・と思うんだ・・が・・
こんなことに数時間もかけてしまった。なぜググるという事を怠ってしまったのか。
いや、怠っていたのではなく、VRDE server という部分をスルーしていたのだ。
繋ぐ方法だが
結論だけ、書く。
リモデスだったリモデスだったリモデスだったリモデスだった
リモデスだったリモデスだったリモデスだったリモデスだった
この数時間 VRDE でググらなかった。
VNCのことばっかりググっていた。
VRDEでググったのはほんの数分前だった。
この数時間は無意味だった。
・・・
では方法も分かったことだし気を取り直してVMの作成に進もう~。
時間は戻らないのだ。多分、入れなおしたVirtualboxはaptではなくDebパッケージでインストールしたのが原因と思われ。
CUIだけでVirtualboxのVMを作る
VMの作り方はQEMUと同じように、CPUやメモリなどをレシピのようなものを流し込んでいく感じです。
さっそくCPUから、CPUは32ビットで進めています。
VBoxManage createvm \
    --name cent \
    --ostype  Linux \
    --register \
    --basefolder /root/cent
メモリは1G、Vramは32Mです。
VBoxManage modifyvm cent --memory 1024

VBoxManage modifyvm cent --vram 32
NICはブリッジでいくので
VBoxManage modifyvm cent --nic1 bridged --bridgeadapter1 em1
HDDを作成。
VBoxManage createhd --filename /root/cent/cent.vdi --size 20000 --format VDI
ストレージコントローラを作成。
VBoxManage storagectl cent --name cent_sata1 --add sata --bootable on
ポート1にさっき作ったHDD、ポート2にDVDをつけます。
VBoxManage storageattach cent \
    --storagectl cent_sata1 \
    --port 1                \
    --type hdd              \
    --medium /root/cent/cent.vdi
VBoxManage storageattach cent \
--storagectl cent_sata1 \
--port 2 \
--type dvddrive \
--medium /home/vagrant/CentOS-6.5-i386-bin-DVD1.iso
VRDEの設定をします。
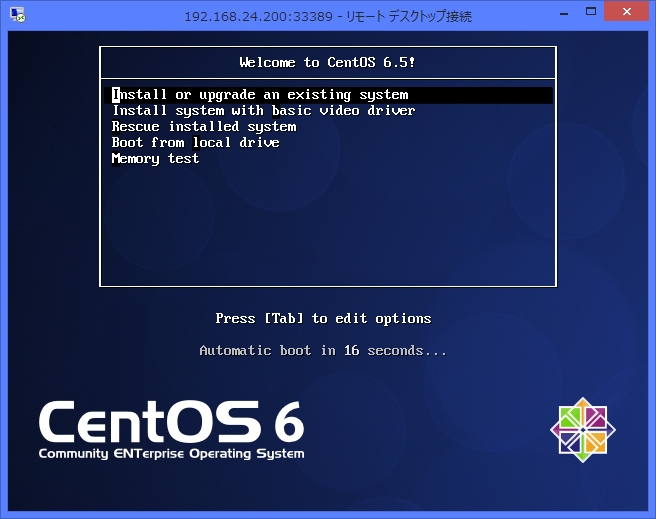
VBoxManage modifyvm cent \
--vrde on \
--vrdeport 32108 \
--vrdeaddress 192.168.24.200 \
--vrdereusecon on
あとはvboxheadless -s VM名で起動してリモデスで繋ぎます。
恐ろしいことに、コード化の要素はいまだになし。。。
インストールは省略します。
今回の日記の冒頭に戻ります。
まずは自分のBOXを作ろう
ちょっとまって、そのBOX大丈夫?という事で、自分で作っておきますよっと。
ただメンドクサイことにUbuntuserverにはX Windowは入れていないのと、Windows環境ではVMwareなのだよ。
なので、サーバー機のCLI環境でVMを作成しました。
環境
Ubuntu14
VirualBOX 4.3.18
Vagrant 1.6.5
参考サイト
CentOS 6.5 x86_64 minimalのVagrant boxを作ってみた
参考サイトを参考にBOXに向いたサーバーを構築します。
VMwareからVirtuslBOXに移行してVagrantで取り込みます。
VMはというと、yum updateはしたけど、その他パッケージ類はまったく入れてません。
いったん最低限の設定だけをした後にパッケージ化してみて、起動したところ今までなかったログがでました。
Please verify that the guest additions are properly installed in the guest
VirutalboxのGuestAdditionを入れてくれと出ました。実はそもそもVmwareから移行する方法を試していた時点でこれが原因で動かないのかな?なんて推測はしていたのだが。
そもそもこのエラーすらでなくて、デバッグモードで起動してもよく分からんところでループしてたもんだから、原因の特定はできていなかったのだね。
でも、これでGuestAdditionが原因な可能性は高まった。もしかするとVMwareから取り込んだときもmodifyvmで変更してGuestAdditionをインストールすれば上手くいくかもしれないが、また気がむいたら。
今はこれ以上追及しにゃい。
VBoxGuestAdditions インストール
やり方はとくに難しくなく、locateでパスを調べてCD-ROMドライブにマウントすればOK。
ゲスト側でdkmsをインストールして、先にすすめよう。
root@ubuntu:~/cent# locate VBoxGuestAdditions.iso
/usr/share/virtualbox/VBoxGuestAdditions.iso
root@ubuntu:~/cent# VBoxManage storageattach cent --storagectl cent_sata1 --port 2 --type dvddrive --medium /usr/share/virtualbox/VBoxGuestAdditions.iso
[root@localhost ~]# mkdir /mnt/cd
[root@localhost ~]# mount /dev/cdrom /mnt/cd
mount: ブロックデバイス /dev/sr0 は書き込み禁止です、読込み専用でマウントします
[root@localhost ~]# ls /mnt/cd
32Bit        OS2                       VBoxWindowsAdditions-amd64.exe  autorun.sh
64Bit        VBoxLinuxAdditions.run    VBoxWindowsAdditions-x86.exe    cert
AUTORUN.INF  VBoxSolarisAdditions.pkg  VBoxWindowsAdditions.exe        runasroot.sh
[root@localhost ~]# sh /mnt/cd/VBoxLinuxAdditions.run --nox11
Verifying archive integrity... All good.
Uncompressing VirtualBox 4.3.18 Guest Additions for Linux............
VirtualBox Guest Additions installer
Copying additional installer modules ...
add_symlink: link file /usr/lib/VBoxGuestAdditions already exists
Installing additional modules ...
Removing existing VirtualBox DKMS kernel modules           [  OK  ]
Removing existing VirtualBox non-DKMS kernel modules       [  OK  ]
Building the VirtualBox Guest Additions kernel modules     [  OK  ]
Doing non-kernel setup of the Guest Additions              [  OK  ]
Starting the VirtualBox Guest Additions                    [  OK  ]
Installing the Window System drivers
Could not find the X.Org or XFree86 Window System, skipping
では、改めてBOXを作りましょうか。
一気に載せます~。
root@ubuntu:~/cent# vagrant package --base cent
==> cent: Exporting VM...
==> cent: Compressing package to: /root/cent/package.box
root@ubuntu:~/cent# vagrant box add cenb /root/cent/package.box
==> box: Adding box 'cenb' (v0) for provider:
    box: Downloading: file:///root/cent/package.box
==> box: Successfully added box 'cenb' (v0) for 'virtualbox'!
root@ubuntu:~/cent# vagrant init cenb
A `Vagrantfile` has been placed in this directory. You are now
ready to `vagrant up` your first virtual environment! Please read
the comments in the Vagrantfile as well as documentation on
`vagrantup.com` for more information on using Vagrant.
root@ubuntu:~/cent# vagrant up
Bringing machine 'default' up with 'virtualbox' provider...
==> default: Importing base box 'cenb'...
==> default: Matching MAC address for NAT networking...
==> default: Setting the name of the VM: cent_default_1415667028644_91438
==> default: Clearing any previously set network interfaces...
==> default: Preparing network interfaces based on configuration...
    default: Adapter 1: nat
==> default: Forwarding ports...
    default: 22 => 2222 (adapter 1)
==> default: Booting VM...
==> default: Waiting for machine to boot. This may take a few minutes...
    default: SSH address: 127.0.0.1:2222
    default: SSH username: vagrant
    default: SSH auth method: private key
    default: Warning: Connection timeout. Retrying...
    default: Warning: Connection timeout. Retrying...
==> default: Machine booted and ready!
==> default: Checking for guest additions in VM...
==> default: Mounting shared folders...
    default: /vagrant => /root/cent
始めて完走!ついにここまで来ました。
接続してみましょう~。
・・・
トゥットゥル ━━(゚∀゚)━━━━━!!
root@ubuntu:~/cent# vagrant ssh
[vagrant@localhost ~]$ cat /etc/redhat-release
CentOS release 6.6 (Final)
やっとできた(´・ω・`)
やっとVagrantに入ります。が、長くなりすぎたので続きは次回に。
参考サイト
@itoeの日記
CUIからVirtualBoxをインストール&VMを操作する
Qiita zakkied
VirtualBox の VM をコマンドラインから管理する
f99aq8oveのブログ
FreeBSD なサーバーに VirtualBox を入れて、その上で Ubuntu server を動かす
oracle Virtualbox 公式